Businesses have a new way to interact with their customers in the form of App Clip and NFC tags. The feature enables users to run a small app on a mobile operating system without going through an App Store. The small software just “pops up” onto the screen, which opens the door to new customer relations tools. For example, coffee shops can offer more practical reward cards, and retailers can make virtual wallets more accessible. Businesses can trigger an App Clip in multiple ways, one of them being an NFC tag pointing to a URL. As users bring their iPhone close to the tag, the smartphone automatically detects the URL and launches the App Clip. The mechanism is simple, and as a result, very cost-effective. Let us, therefore, explore what it would take for a business to use App Clip.
What is App Clip?
Apple describes App Clip as a “lightweight version of [an] app”. The uncompressed binary takes less than 10 MB, and it primarily focuses on a small subset of an app. For instance, a cafe’s full application can offer a directory of its stores, a list of upcoming events, an enumeration of its sales, and a reward card, but the App Clip will only show the latter. These restrictions ensure that the user experience is instantaneous, even with a low-speed cellular connection. The user experience is also straightforward. Triggering an App Clip by bringing a phone to an NFC tag reduces friction, opening digital interactions to new customers less familiar with mobile apps. Hence, we sat down with one of ST’s iOS app developers, Vincent Latorre, to share his App Clip experience.
App Clip: The Client-Side or NFC Configuration
1. Get the ST25-TAG-BAG-U

The easiest aspect of this whole process is setting up an NFC tag to point to a URL that will then point to the App Clip. The process is so simple it’s possible to set up a working demo without writing a single line of code. For the sake of this demonstration, we’ll use two ST25TV02K NFC tags. One will hold the URL pointing to the App Clip while the second tag will serve as a proof-of-concept to teach about cacheable capability containers.
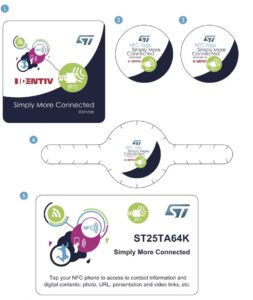
For a demo only focusing on App Clip, that second tag isn’t necessary and developers can just focus on the first one. However, we wanted to take this opportunity to address to show to write memory block and offer a concrete proof that ST’s app clip is really doing its job rather than display a dummy screen. Both tags are small round stickers from the ST25-TAG-BAG-U kit. Finally, users must download our NFC Tap app from the App Store to write onto the tags.
Write the URL
Let’s take the first ST25TV02K. The following demo works under the assumption that the tag is blank. The first step is to select Read Tag from the main screen and place the phone close to the tag. A screen will appear showing information about the ST25TV02K. The next step is to select ... at the bottom right of the screen and choose Areas Content Editor, then scan the tag. If the tag is blank, a box will appear showing the memory size (e.g 256 bytes) and saying No NDEF message.
To write an NDEF message, users simply need to tap onto the blog saying No NDEF message. A new panel will appear showcasing a white box with blue arrows. Swiping that box toward the left reveals a menu with the options Add, Edit, Insert, and Exec. After selecting Add
- Choose
NdefUriRecord - Enter the URL
https://www.myst25.com/clip. Please make sure to choose https or the App Clip won’t display right away. Validateand write to the tag
Learning about Capability Containers
The second ST25TV02K will serve as our test subject and as a way to learn more about NDEF support in Type-5 tags. The demonstration shows that ST’s App Clip is reading a tag and not just displaying a screen. And to make things a little more interesting, we took a cue from our application note on NDEF management. Indeed, the document shows how to configure a ST25TV tag to act as an NFC Type-5 Tag supporting NDEF messages. In a nutshell, all it takes is to write a valid capability container (CC) in the first memory block. The document walks users through the setup, but for the sake of example, we can write the ST25TV02K’s first memory block with the following four-byte CC: E1 40 20 01h.
Write the Test Tag
To perform this task, open the NFC Tap iOS app, then
- Select Read Tag and scan the second ST25TV02K tag
- Check the CC File section to see that the tag is empty. If its Magic Number is
0x00, then it doesn’t contain any information yet.
We will now activate NDEF messaging support and write a little message.
- Select
Moreat the bottom of the screen and thenAreas Content Editor. The app will ask you to scan the tag then reveal that there’s one writable area of 256 bytes with no content on it. - Tap
Area 1 - A new screen appears, whining that there’s
No NDEF Record. Swipe this message left to reveal a menu and then chooseAdd. - Tap
NdefTextRecord, erase the existing text, and enterHello World! - Press
Validateand lower the phone to the tag to write the NDEF message.
Test App Clip
App Clip only shows up if the full application is not present on the phone. Hence, it’s essential to delete NFC Tap, if installed, before scanning the first ST25TV02K that received the AppClip’s URL. As soon as the phone detects the first tag, it will display the AppClip Card, asking if the user wants to open the AppClip or download the app from the App Store. Opening the App Clip reveals a trimmed-down version of the NFC Tap app where Read NDEF is grayed out, but Read Tag is available. Choosing this option to read the second ST25TV02K shows that the App Clip gets data from our tag. Scrolling down, we see the 0xE1 Magic number, which demonstrates that App Clip is scanning the tag we just configured.
App Clip: The Backend or App Development and Web Server Configuration
Xcode Project
The first step for developers wishing to learn more is to download our iOS application’s source code (STSW-ST25IOS001). Engineers just need to open the file in Apple IDE’s to start studying our implementation. The first thing to notice is that the portion of the application that serves as an App Clip is a specific target. Apple provides a dedicated App Clip template to assist developers, and the small app can work with Apple Pay and Sign in with Apple. This new system also benefits from a special notification and geolocation system. Moreover, it is possible to have multiple App Clips for one iOS software. Within Xcode, developers should pay attention to the Signing & Capabilities tab. Indeed, they will need to remember the team name and bundle identifier.
The next step is to set up the App Clip using the App Store Connect web interface. That’s where developers will upload the picture that will show up on the iOS card inviting users to launch the App Clip. Clicking on Advanced App Clip Experience will open a new menu to set up the URL that will point to the App Clip. Additionally, developers can request that the operating system check the mobile device’s geolocation. Businesses may choose to use this feature to associate an App Clip with a store or a specific place.
Server-Side
The web server configuration is very straightforward. At the URL defined within Xcode and the App Store Connect, e.g., http://www.myst25.com/clip, developers must have an index.html file with a meta tag containing the app’s ID and bundle ID. As we show below, the body can remain empty. What matters is the meta tag itself.
<html>
<head>
<meta name="apple-itunes-app" content="app-id=THEAPPID, app-clip-bundle-id=THEAPPBUNDLEID">
</head>
<body>
</body>
</html>
The second important file that must be present in the root folder of the webserver (e.g., /www) is a file called apple-app-site-association. The file simply lists the following array:
"appclips" : {
	"apps": ["TEAM_NAME.BUNDLE_ID (e.g., UL3MK8FNMR.com.st.st25ncf.clip)"],
	"paths": ["DESTINATION (e.g., path/*)"]
	}
